Dynamically Hosting a WCF Service using WcfStormHost
WcfStormHost is an application that is able to host automatically host any wcf service. It automatically detects changes in the service's assemblies (*.exe and *.dll) files and config file. If a change is detected the WCF is automatically re-hosted without having to restart the application.
Note: WcfstormHost requires .NET 3.5
Download WcfStormHost
To get started with it, please follow the steps below. In this short tutorial, we'll create a wcf service and host it into WcfStormHost
- Open Visual Studio and create WCF Service project.
 namespace  WcfService
     {
         [ServiceContract ]


     public  interface  ITestSvc

         {
             [OperationContract ]


         int  Add(int  a, int  b);

             [OperationContract ]


         TestDC  Test2(TestDC  dc);

         }


     public  class  MyTestSvc  : ITestSvc

         {


         private  static  int  counter = 0;


         public  int  Add(int  a, int  b)

             {
                 return  a + b;
             }


         public  TestDC  Test2(TestDC  dc)

             {
                 dc.Counter = (++counter).ToString();
                 dc.Id = Guid .NewGuid().ToString();
                 return  dc;
             }
         }
         [DataContract ]


     public  class  TestDC

         {
             [DataMember ]


         public  string  Counter { get ; set ; }

             [DataMember ]


         public  string  Id { get ; set ; }

         }
     }
- Add an App.config file and configure it correctly. In sample config below, the service exposes an http metadata endpoint and use netTcpBinding
<?xml version="1.0"?>
<configuration>
<appSettings>
<add key="test" value="sdf"/>
</appSettings>
<system.serviceModel>
<services>
<service behaviorConfiguration="debugBehavior" name="WcfService.MyTestSvc">
<endpoint address="net" binding="netTcpBinding" bindingConfiguration=""
name="net" contract="WcfService.ITestSvc" />
<endpoint address="mex" binding="mexHttpBinding" bindingConfiguration=""
name="mx" contract="IMetadataExchange" />
<host>
<baseAddresses>
<add baseAddress="net.tcp://localhost:8888/tcpEndpoint" />
<add baseAddress="http://localhost:81/httpEndpoint" />
</baseAddresses>
</host>
</service>
</services>
<behaviors>
<serviceBehaviors>
<behavior name="debugBehavior">
<serviceMetadata httpGetEnabled="true" httpsGetEnabled="false"/>
<serviceDebug includeExceptionDetailInFaults="true"/>
</behavior>
</serviceBehaviors>
</behaviors>
<bindings />
</system.serviceModel>
<startup><supportedRuntime version="v2.0.50727"/></startup></configuration>
- Compile it.
- Start WcfStormHost Admin Service ( Start --> WcfStom Host --> WCFStormHost Admin)
- If there are no services currently hosted, a message box will popup asking whether you'd like to host a WCF Service. Otherwise, Click on "Host Service" in the menu. Browse to the folder where the assemblies are stored. For our sample project, the output will be in the $Project/bin/debug folder.

- WcfStormHost will then load the assemblies and attempt to match the config file with the correct wcfservice type. Select the service to host. Click OK

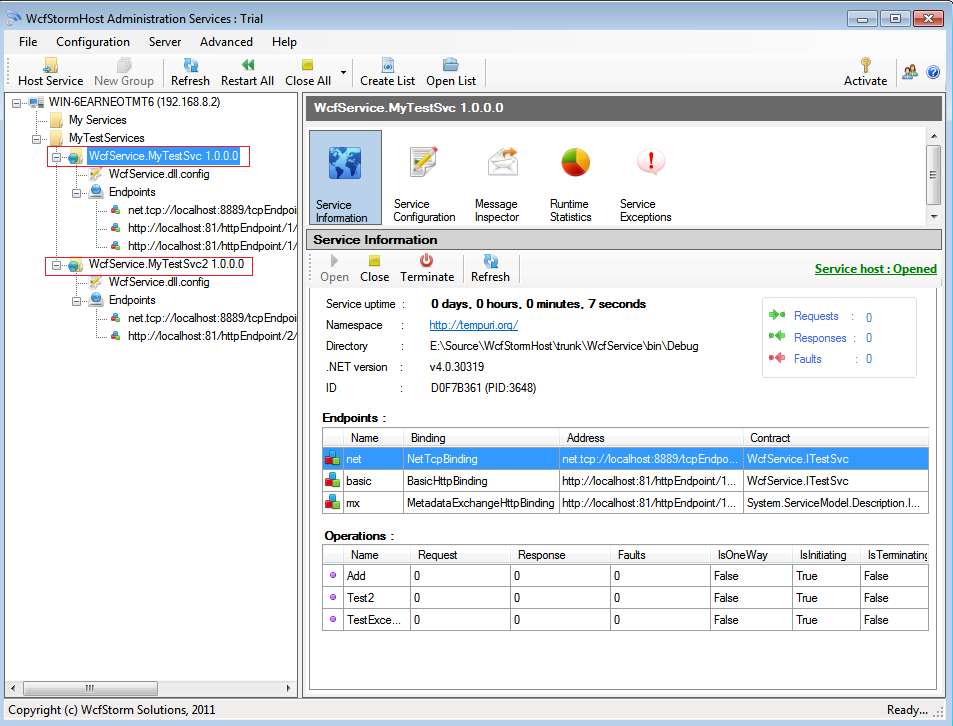
- WcfStormHost will then host the service. That's it!
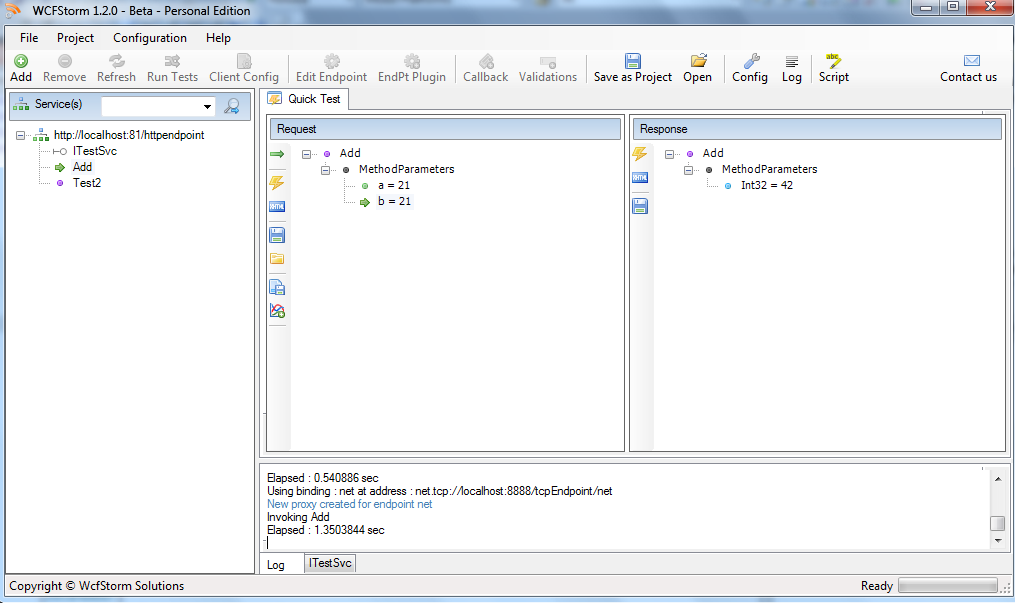
Here's how the newly hosted service looks in WcfStorm